
Install Exchange Server step by step on Windows Server. Before you start installing Exchange Server, make sure to install Exchange Server prerequisites first. After that, prepare Active Directory and domains for Exchange Server. After doing both tasks, you are ready to install Exchange Server. In this article, you will learn how to install Exchange Server.
Download Exchange Server
Go to the Exchange Server build numbers and release dates page. The page lists all Exchange Server build numbers and release dates. Download and save the Exchange Server ISO image.
Note: We recommend downloading the latest Exchange Server build version.
In File Explorer, right-click on the Exchange Server CU ISO image file and select Mount. It will mount the ISO to a drive. For example, the E:\ drive. The E:\ drive contains the Exchange installation files.
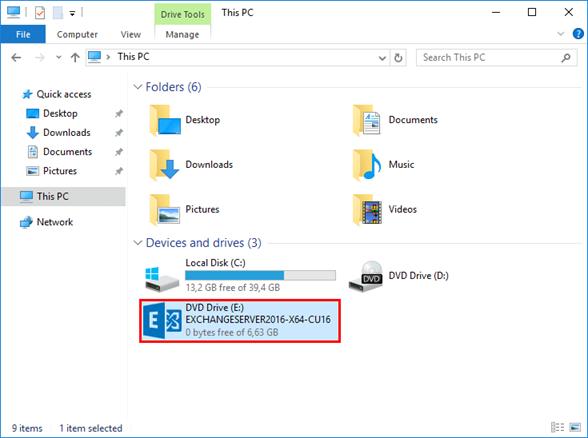
Mount the Exchange ISO image before proceeding to the next step.
Before installing Exchange Server
Before you can proceed further with the Exchange Server installation you must complete the following:
- Install Exchange Server prerequisites
- Prepare Active Directory and domains for Exchange Server
After you have walked through the above configuration, install the Exchange Mailbox Server Role.
Install Exchange Server prerequisites
Install Exchange Server prerequisites before you start to install Exchange Server. Ensure you have an operating system that supports the Exchange Server version that you want to install. In this article, we will look at how to install Exchange Server prerequisites on Windows Server.
Mailbox and Edge Transport server roles
The Mailbox server contains:
- Transport services that are used to route mail
- Mailbox databases that process, render, and store data
- Client Access services that accept client connections for all protocols
The Edge Transport server is:
- An optional role that handles all external mail flow for the Exchange organization
- Protecting the Exchange organization from viruses and spam as mail enters and leaves
- Installed in an Exchange organization perimeter (DMZ) network
Supported operating systems
Have a look at which operating systems support Exchange Server 2016 and Exchange Server 2019.
Exchange Server 2016
- Windows Server 2016 Standard or Datacenter (Exchange Server 2016 CU3 or later)
- Windows Server 2012 R2 Standard or Datacenter
- Windows Server 2012 Standard or Datacenter
- Windows Server Desktop Experience
Exchange Server 2019
- Windows Server 2022 Standard or Datacenter (Exchange Server 2019 CU12 or later)
- Windows Server 2019 Standard or Datacenter
- Windows Server Desktop Experience
- Windows Server Core
Install Exchange Mailbox server prerequisites
Follow the steps below to install Exchange Mailbox server prerequisites for Windows Server.
Step 1. Run PowerShell as administrator. Run the following command to install the required Windows components.
Install-WindowsFeature Server-Media-Foundation, NET-Framework-45-Core, NET-Framework-45-ASPNET, NET-WCF-HTTP-Activation45, NET-WCF-Pipe-Activation45, NET-WCF-TCP-Activation45, NET-WCF-TCP-PortSharing45, RPC-over-HTTP-proxy, RSAT-Clustering, RSAT-Clustering-CmdInterface, RSAT-Clustering-Mgmt, RSAT-Clustering-PowerShell, WAS-Process-Model, Web-Asp-Net45, Web-Basic-Auth, Web-Client-Auth, Web-Digest-Auth, Web-Dir-Browsing, Web-Dyn-Compression, Web-Http-Errors, Web-Http-Logging, Web-Http-Redirect, Web-Http-Tracing, Web-ISAPI-Ext, Web-ISAPI-Filter, Web-Metabase, Web-Mgmt-Console, Web-Mgmt-Service, Web-Net-Ext45, Web-Request-Monitor, Web-Server, Web-Stat-Compression, Web-Static-Content, Web-Windows-Auth, Web-WMI, Windows-Identity-Foundation, RSAT-ADDS
Step 2. Install .NET Framework 4.8 (restart required).
Step 3. Install Visual C++ Redistributable for Visual Studio 2012.
Step 4. Install Visual C++ Redistributable Packages for Visual Studio 2013.
Step 5. Install IIS URL Rewrite Module.
Note: The IIS URL Rewrite Module is required with Exchange Server 2016 CU22 and Exchange Server 2019 CU11 or later.
Step 6. Install Unified Communications Managed API 4.0 Runtime.
Install Exchange Edge Transport server prerequisites
Follow the steps below to install Exchange Edge Transport server prerequisites for Windows Server.
Step 1. Run PowerShell as administrator. Run the following command to install the required Windows components.
Install-WindowsFeature ADLDS
Step 2. Install .NET Framework 4.8 (restart required).
Step 3. Install Visual C++ Redistributable for Visual Studio 2012.
Install Exchange Management tools prerequisites
Follow the steps below to install Exchange Management tools prerequisites:
Step 1. Install Visual C++ Redistributable for Visual Studio 2012.
Step 2. Run PowerShell as administrator and run the following command to install the required Windows components.
Windows Server OS:
Install-WindowsFeature -Name Web-Mgmt-Console, Web-Metabase
Windows 10 and Windows 11 OS:
Enable-WindowsOptionalFeature -Online -FeatureName IIS-ManagementConsole, IIS-Metabase -All
Prepare Active Directory and domains for Exchange Server
You want to prepare Active Directory (AD) schema and domains for Exchange Server. Before you prepare Active Directory and domains for Exchange, install Exchange Server prerequisites. After that, you can install Exchange Server in the organization.
Information
Before you start, sign in to the Windows Server that will be the Exchange Server, and go through these steps:
- Install the latest Windows Updates
- Restart after installing Windows Updates
- Join the server to the domain
Prerequisites extending the Active Directory
Before extending the Active Directory schema, the following needs to be installed on the Exchange Server:
- .NET Framework must be installed
- The RSAT-ADDS feature must be installed
- Account needs to be added to the Schema Admins and Enterprise Admins security groups
Install .NET Framework
.NET Framework is already installed if you have followed Install Exchange Server prerequisites. If you didn’t, find the correct .NET Framework version on the Exchange Server supportability matrix. Go to the download page of .NET Framework and download the appropriate version.
In our example, we have to install .NET Framework 4.8. If the download finishes, right-click the file and choose run as administrator. Install the .NET Framework on the Exchange Server. Restart when the installation completes.

Note: You can extend the Active Directory Schema from the domain controller or any other server in the organization. The feature RSAT-ADDS is already installed on the domain controller. If you want to prepare the schema on the Domain Controller, you only need to install the .NET Framework. Some organizations have different teams because of different administrative responsibilities in the environment.
Install RSAT-ADDS feature
RSAT-ADDS feature is already installed if you have followed Install Exchange Server prerequisites. Suppose you didn’t install the RSAT-ADDS feature. Run PowerShell as administrator. Run the Install-WindowsFeature cmdlet, including the RSAT-ADDS feature.
Install-WindowsFeature RSAT-ADDS
The output below appears.
Success Restart Needed Exit Code Feature Result
——- ————– ——— ————–
True No Success {Remote Server Administration Tools, Activ…
Schema Admins and Enterprise Admins security groups
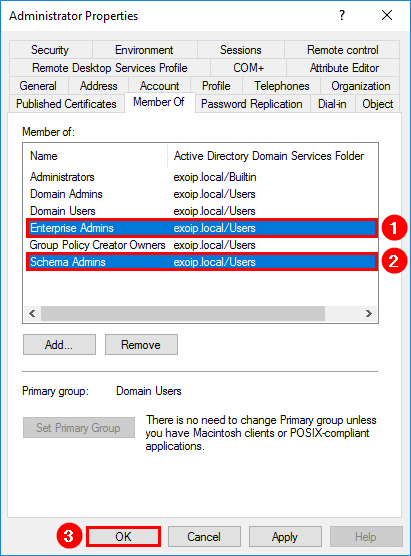
Before you can extend the schema, your account needs to be a member of the Schema Admins and Enterprise Admins security groups. Open Active Directory and add both groups to your account if it’s not set already. These are high privilege groups. We recommend removing your account from the groups when you’re done with this task.
Note: If you’ve just added yourself to these groups, you’ll need to log out and back into the server for the new group membership to take effect.
Prepare Active Directory Schema
The first step in getting your organization ready for Exchange Server is to extend the Active Directory schema. Exchange stores a lot of information in Active Directory, but before it can do that, it needs to add/update classes and attributes.
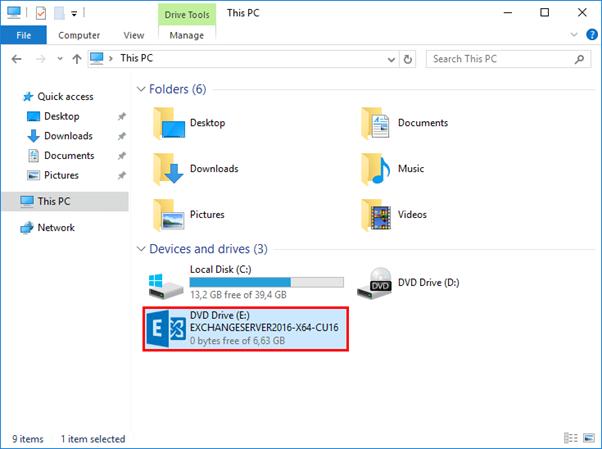
In File Explorer, right-click on the Exchange Server CU ISO image file and select Mount. It will mount the ISO image to a drive. For example, the E:\ drive. The E:\ drive contains the Exchange installation files. Make sure to mount the Exchange ISO image before proceeding to the next step.
Run Command Prompt as administrator. Run the following command to extend/prepare the schema for Exchange Server.
E:\Setup.exe /IAcceptExchangeServerLicenseTerms_DiagnosticDataOFF /PrepareSchema
You will see the COMPLETED messages in the output. The extend/prepare schema for Exchange Server went successfully.
Prepare Active Directory
After the Active Directory schema has been extended, you can prepare other parts of Active Directory for Exchange Server. During this step, Exchange will create containers, objects, and other items in Active Directory to store information. The collection of the Exchange containers, objects, attributes, and so on is called the Exchange organization.
If you followed the article, you are already a member of the Schema Admins and Enterprise Admins security groups. Open Active Directory and add both groups to your account if it’s not set already. These are high privilege groups. We recommend you to remove your account from the groups when you’re done with this task.
Note: If you’ve just added yourself to these groups, you’ll need to log out and back into the Server for the new group membership to take effect.
If you do not already have an Exchange organization, you’ll need to provide a name for the organization.
Note: You need to select a name for the Exchange organization. The organization name is used internally by Exchange. It isn’t typically seen by users and doesn’t affect the functionality of Exchange. Also, it doesn’t determine what you can use for email addresses. The organization name can’t contain more than 64 characters and can’t be blank. Valid characters are A to Z, a to z, 0 to 9, hyphen or dash (-), and space, but leading or trailing spaces aren’t allowed. You can’t change the organization name after it’s set.
Run Command Prompt as administrator. Run the following command to prepare Active Directory for Exchange Server.
E:\Setup.exe /IAcceptExchangeServerLicenseTerms_DiagnosticDataOFF /PrepareAD /OrganizationName:”EXOIP”
The output will then display “The Exchange Server setup operation completed.
If you’re installing Exchange Server into an existing Exchange organization, you do not need to specify the organization name.
Run Command Prompt as administrator. Run the following command to prepare Active Directory for Exchange Server.
E:\Setup.exe /IAcceptExchangeServerLicenseTerms_DiagnosticDataOFF /PrepareAD
Prepare Active Directory domains
The final step to get Active Directory ready for Exchange is to prepare each of the Active Directory domains where Exchange will be installed. This step creates additional containers, security groups and sets permissions so that Exchange can access them.
If you have more than one domain, you can run the following command in Command Prompt to prepare all the domains for Exchange Server.
Note: If you have only one domain, you can skip this step because the /PrepareAD command in the previous step has already prepared the domain for you.
E:\Setup.exe /IAcceptExchangeServerLicenseTerms_DiagnosticDataOFF /PrepareAllDomains
You will get this at the end “The Exchange Server setup operation completed successfully.”
Check Exchange Active Directory versions
After you prepare AD for Exchange Server, you like to check if the Active Directory is updated. Run PowerShell as administrator. Make sure that you set the Execution Policy to Unrestricted. If you don’t, the script will not run.
Set-ExecutionPolicy Unrestricted -Force
Run the following commands one by one.
# Exchange Schema Version
$sc = (Get-ADRootDSE).SchemaNamingContext
$ob = “CN=ms-Exch-Schema-Version-Pt,” + $sc
Write-Output “RangeUpper: $((Get-ADObject $ob -pr rangeUpper).rangeUpper)”
# Exchange Object Version (domain)
$dc = (Get-ADRootDSE).DefaultNamingContext
$ob = “CN=Microsoft Exchange System Objects,” + $dc
Write-Output “ObjectVersion (Default): $((Get-ADObject $ob -pr objectVersion).objectVersion)”
# Exchange Object Version (forest)
$cc = (Get-ADRootDSE).ConfigurationNamingContext
$fl = “(objectClass=msExchOrganizationContainer)”
Write-Output “ObjectVersion (Configuration): $((Get-ADObject -LDAPFilter $fl -SearchBase $cc -pr objectVersion).objectVersion)”
Important: After you install Exchange on a server, you must not change the server’s name. Renaming a server after you’ve installed an Exchange server role is not supported.
Install Exchange Server with command line
There are two options for installing Exchange server. You can choose to:
- Install Exchange Mailbox server using the setup wizard
- Install Exchange Mailbox server using unattended mode (this article)
The Exchange setup wizard will guide you to install Exchange Server with GUI. The Exchange unattended mode will install Exchange Server with the command line.
Note: The Exchange Server installation will fail if there is a pending reboot available on the system. We recommend restarting the Windows Server before you start the installation.
Run Command Prompt as administrator. Install the Mailbox Server Role and the management tools in the default folder on the local server.
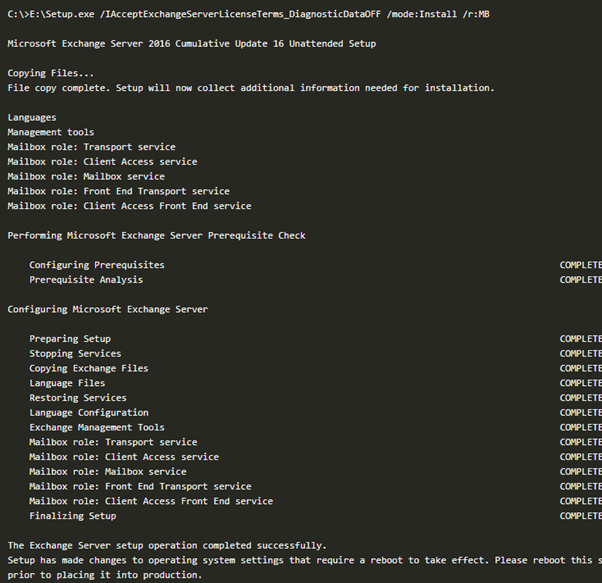
Exchange Server Mailbox Role finished installing. Reboot the server.
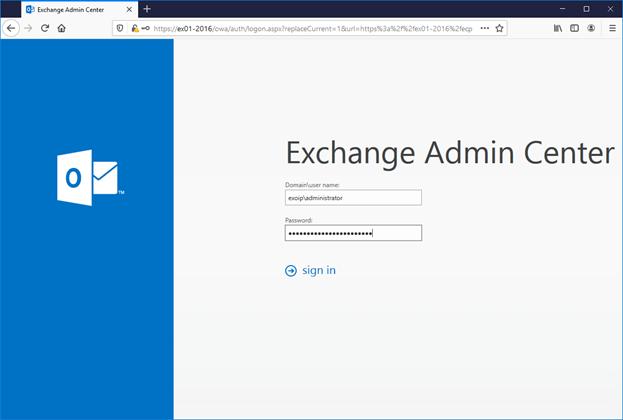
Sign in to Exchange Admin Center (EAC)
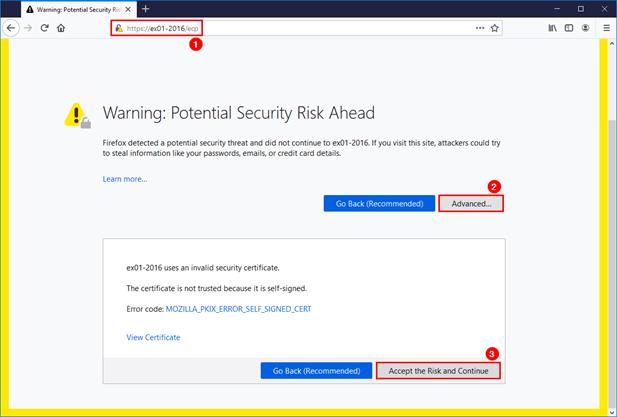
Sign in to Exchange Admin Center (EAC). Start your favourite browser and go to https://hostname/ecp. Change the hostname to yours. Another way is to use https://localhost/ecp.
You will get a certificate warning in your browser. Accept the risk and continue.
In our example, the Exchange Server hostname is EX01-2016.
Fill in the domain and administrator credentials. Then, click sign in.
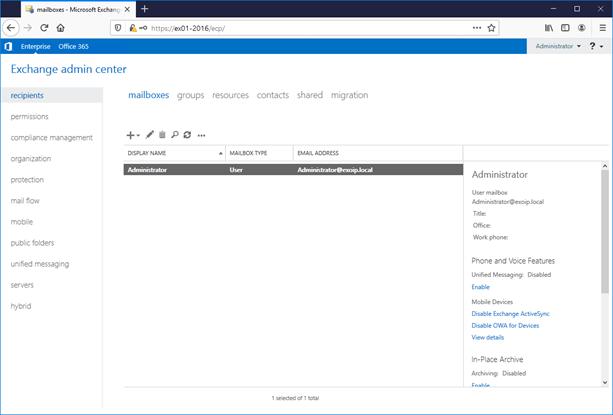
The mailboxes area is almost empty, except for one mailbox that shows up. That’s the account that you used for installing Exchange Server.
Conclusion
You learned how to install Exchange Server step by step on Windows Server. An excellent way to install the Mailbox Server Role is with the command line. After a reboot, verify that you can sign in to the Exchange Admin Center.
No responses yet